
Getting your bathroom renovation just right means paying attention to all the details, and lighting is a big one. A well-lit bathroom not only looks good but also makes the space feel more welcoming and functional. If you’re wondering how to install a bathroom light fixture yourself, you’ve come to the right place. We’ll walk you through the process so you can get that new light up and shining.
Key Takeaways
- Always turn off the power at the breaker box before starting any electrical work to ensure your safety.
- Carefully remove the old fixture, taking a picture of the wiring connections as a reference.
- Install the new mounting bracket securely to the junction box.
- Connect the wires (ground, neutral, and hot) correctly using wire nuts and electrical tape.
- Test the new fixture by turning the power back on and checking its function.
Understanding Your Bathroom Light Fixture Installation Project
So, you’re looking to tackle a DIY bathroom light fixture upgrade? That’s awesome! Installing new bathroom lighting can really change the feel of the whole room, making it brighter and more inviting. Whether you’re replacing an old, dated fixture or adding new lights as part of a bigger renovation, this project is totally doable for most homeowners. It’s not just about screwing in a new light; it’s about understanding the basics of electrical work and making sure everything is safe and looks good.
This bathroom lighting installation guide will walk you through the process. We’ll cover everything from what tools you’ll need to the actual steps of mounting ceiling lights in your bathroom. It might seem a bit intimidating at first, especially if you’re new to this kind of work, but breaking it down makes it much simpler. The most important thing to remember throughout this whole process is safety first.
Here’s a quick look at what we’ll cover:
- Turning off the power – seriously, don’t skip this!
- Removing the old fixture carefully.
- Connecting the new wiring correctly.
- Securing your new light fixture.
- Testing everything out.
Working with electricity can be dangerous if you’re not careful. Always double-check that the power is off before you touch any wires. If you’re ever unsure about a step, it’s better to stop and get professional help than to risk an accident.
We’ll also touch on choosing the right fixture for your space and what materials you’ll need. Getting this right means you’ll have a beautifully lit bathroom that you can be proud of. Ready to get started on how to install a bathroom light fixture?
Choosing the Right Bathroom Light Fixture
Picking out the right light fixture for your bathroom can make a big difference, especially when you’re replacing bathroom vanity lights. It’s not just about how it looks, but also how it functions. You want something that gives off good light for tasks like shaving or putting on makeup, but also something that can create a nice mood when you just want to relax.
Think about the size of your bathroom and the area you’re lighting. A huge fixture in a tiny powder room will look out of place, and a small one in a large master bath might get lost. Also, consider the style of your bathroom. Is it modern, traditional, or something in between? The fixture should fit in with the rest of your decor.
Here are a few things to keep in mind:
- Style and Finish: Look for fixtures that match your existing hardware (like faucets and cabinet pulls) or complement your tile and paint colors. Common finishes include brushed nickel, chrome, oil-rubbed bronze, and matte black.
- Light Type: Do you want bright, clear light or something softer? LED fixtures are a popular choice because they’re energy-efficient and last a long time. You can also get bulbs with different color temperatures, from warm white to cool white.
- Functionality: Consider if you need a single fixture, a pair of sconces, or something else. For vanity areas, placing lights on either side of the mirror is often best to avoid shadows on your face.
When selecting bulbs, pay attention to the Color Rendering Index (CRI). A higher CRI means colors will look more natural under the light, which is especially helpful for tasks like applying makeup.
Don’t forget about dimmers! Adding a dimmer switch gives you a lot of flexibility. You can have bright light when you need it for cleaning or grooming, and then dim it down for a more spa-like atmosphere in the evening. It’s a simple addition that really changes the feel of the room.
Tools and Materials You’ll Need
Alright, let’s talk about what you’ll need to get this bathroom light fixture installed. It’s not a super long list, which is good news for your wallet and your sanity. Having the right stuff ready makes the whole process go way smoother.
Here’s a rundown of the essentials:
- New Light Fixture: Obviously! Make sure it fits the style and design you’re going for in your bathroom. Sometimes they come with their own mounting hardware and wire nuts, which is a nice bonus.
- Screwdriver Set: You’ll likely need a Phillips head and maybe a flathead. These are for removing the old fixture and attaching the new mounting bracket.
- Wire Strippers/Cutters: These are key for getting a good connection. You’ll need to strip a bit of the plastic coating off the ends of the wires.
- Voltage Tester: This is super important for safety. You absolutely want to make sure the power is off before you start messing with wires.
- Wire Nuts: These little guys twist onto the bare ends of the wires to connect them securely. Your new fixture might include some.
- Electrical Tape: For an extra layer of security around those wire nut connections.
- Ladder or Step Stool: You’ll be working overhead, so you need to be able to reach comfortably and safely.
- Pliers (Needle-Nose): Handy for gripping and manipulating wires.
- Drill (Optional but helpful): Might be needed for pilot holes or if your mounting bracket requires it.
It’s a good idea to gather everything before you even think about turning off the power. You don’t want to be halfway through the job and realize you’re missing a critical piece. Having a headlamp can also be a lifesaver if your bathroom doesn’t have much natural light.
When you’re picking out your new light, think about how it will complement the overall bathroom design. Sometimes, the fixture itself can be a statement piece. Just make sure it’s rated for bathroom use, especially if it’s going to be near a shower or tub.
Preparing Your Bathroom for Installation
Before you even think about touching wires or mounting brackets, getting the bathroom ready is a big part of the job. This isn’t just about clearing space; it’s about making sure the area is safe and that your new fixture will look good with everything else. If you’re doing a full renovation, things like bathtub reglazing, new vanities, cabinets, countertops, and tiles are probably already in the works or completed. The lighting needs to complement all of that.
Make sure you have any necessary permits, like a renovation permit in Montreal, before starting major work.
Here’s a quick rundown of what to do:
- Clear the Area: Remove anything that could get in the way or be damaged. This includes towels, bath mats, toiletries, and any decor. If you’re working near the vanity or cabinets, move smaller items off the countertops.
- Protect Surfaces: Cover any sensitive surfaces like new tiles or countertops with drop cloths or old sheets. This protects them from dust, accidental scratches, or drips from paint or other materials.
- Check Existing Wiring: If you’re replacing an old fixture, take a moment to look at the existing wiring. Is it old and brittle? Does it look damaged? Sometimes, you might need to update the wiring before installing a new fixture, especially if the new one has different power requirements. This is where professional bathroom renovation services can be a lifesaver if you’re unsure.
- Gather Your Tools and Materials: Have everything you need within reach. This includes your new light fixture, mounting hardware, wire strippers, a voltage tester, screwdrivers, and a ladder. Having everything ready means fewer trips up and down the ladder.
Working on electrical fixtures can be tricky. If you’re not comfortable with the wiring or if the existing setup looks questionable, it’s always best to call in a professional. Safety first, always.
Think about the overall look. Does the new light fixture fit with the style of your vanities and the rest of the bathroom? Sometimes, a small detail like this can make a big difference in the final appearance.
Step-by-Step Installation Guide

Alright, let’s get this new light fixture up! It might seem a little daunting, but we’ll break it down.
First things first, and this is super important: make absolutely sure the power is off at the breaker box. Seriously, double-check it. Flip the light switch in the bathroom a couple of times to be sure nothing’s live. You don’t want any surprises.
Now, take down that old fixture. Usually, there are a few screws holding it to the mounting plate. Once it’s off, take a quick picture of how the wires are connected. It’s a lifesaver if you get stuck later.
Next, you’ll likely need to install a new mounting bracket. This just screws into the electrical box in the ceiling. Make sure it’s snug and level.
Here’s where the wiring happens. You’ll see wires coming from the ceiling box – usually a ground wire (often green or bare copper), a neutral wire (white), and a hot wire (black). Your new fixture will have corresponding wires. Connect the ground wire from the fixture to the ground wire from the box, usually with a wire nut. Then, connect the white wires together and the black wires together, again using wire nuts. Twist them on tight!
Be prepared for anything when you take down the old fixture. Sometimes the wiring is straightforward, but other times you might find older connections or different colored wires. Having that photo and a voltage tester handy is a good idea.
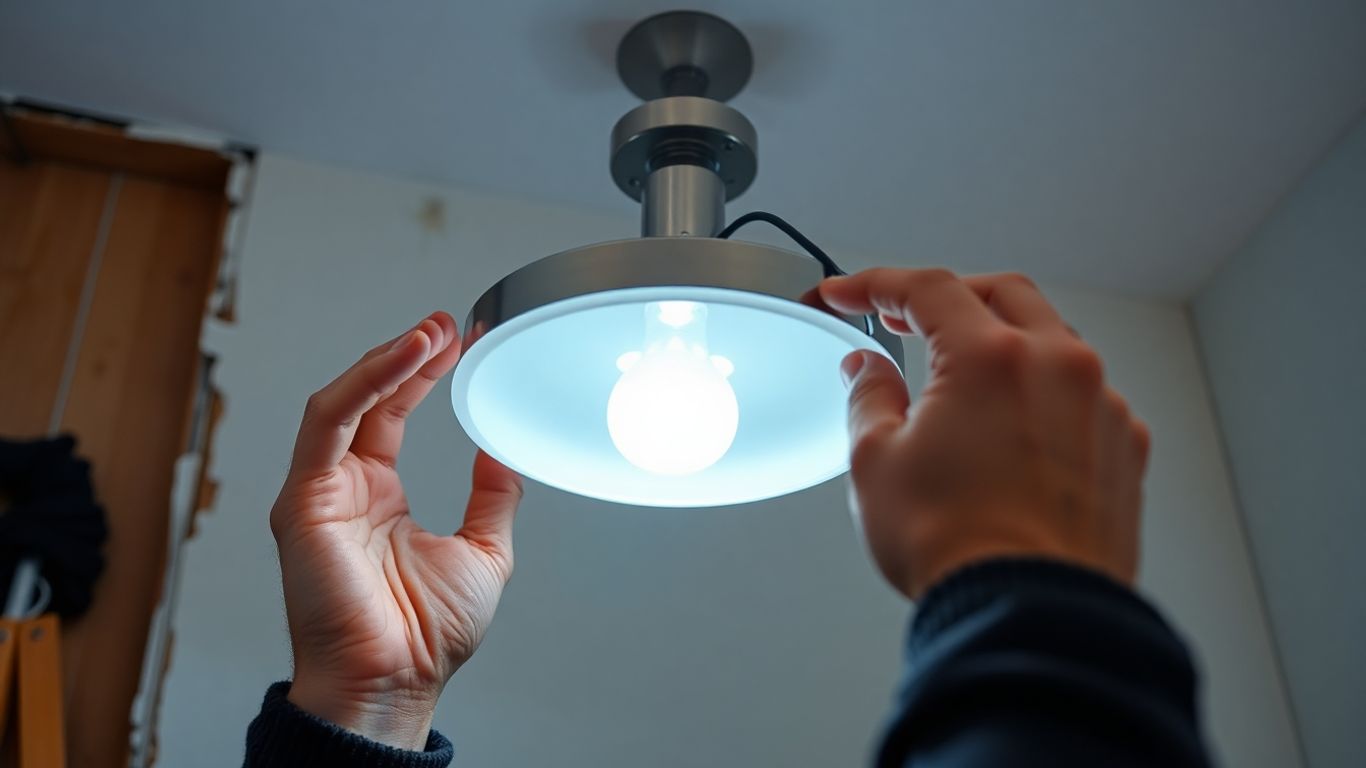
Once the wires are all connected and tucked neatly into the box, it’s time to attach the new fixture itself to the mounting bracket. This usually involves screwing it in place.
Finally, put in your light bulb(s) – make sure the wattage is right for the fixture – and turn the power back on at the breaker. Flip the switch and admire your work!
Safety Tips During Installation
Alright, let’s talk about staying safe while you’re up on that ladder wrestling with wires. This isn’t the time to be a daredevil, okay? The absolute first thing you need to do, and I can’t stress this enough, is to kill the power. Go to your breaker box and flip the switch for the bathroom. Then, go back to the bathroom and try turning on the light switch – nothing should happen. If you have a voltage tester, now’s the time to use it on the wires you’ll be touching. Just to be extra sure, right?
Working with electrical wiring can be tricky, especially on your own. A helpful tip is to temporarily attach the mounting plate first, then hang the fixture while connecting the wires — it keeps everything stable. For larger projects, hiring professional basement lighting renovation services ensures the work is done safely and correctly, saving you time and stress.
Here are a few things to keep in mind:
- Always double-check that the power is off. Seriously, do it again. And again.
- If you’re unsure about any part of the wiring, stop. It’s better to call an electrician than to risk a shock or a fire.
- Make sure your wire connections are solid. Twist them together well and use wire nuts. Then, wrap them with electrical tape for good measure. Loose wires are a fire hazard.
- Don’t rush. Take your time with each step, especially when connecting the wires and attaching the fixture. Rushing leads to mistakes, and mistakes can be dangerous.
The layout design of your bathroom might influence where you can place the fixture, but safety should always be the top priority. Don’t try to force a fixture into a spot that makes the wiring difficult or unsafe to access.
Remember, the goal is to have a nice new light, not a trip to the emergency room. So, be smart, be careful, and if you feel overwhelmed, don’t hesitate to get some help.
Testing and Adjustments
Alright, you’ve got the new light fixture all wired up and attached. Now for the moment of truth – turning the power back on and seeing if it all works. Head back to your breaker box and flip that switch back on. Then, head to the bathroom and flip the light switch.
Hopefully, your new light illuminates the space beautifully! If it does, fantastic! You’re pretty much done. Just give the fixture a gentle wiggle to make sure it’s secure and that nothing feels loose.
But what if it doesn’t light up? Don’t panic. It’s pretty common to have to troubleshoot a bit.
Here’s a quick checklist:
- Check the Breaker: Did you flip the right breaker back on? Sometimes it’s easy to get them mixed up.
- Review Your Connections: Go back to the wiring. Did you connect the wires securely? Sometimes a wire nut can loosen, or a wire might have slipped out. Double-check that the black wire is connected to the brass screw, the white wire to the silver screw, and the ground wire (usually green or bare copper) is connected to the grounding screw.
- Bulb Check: Is the light bulb screwed in all the way? Is it the correct wattage for the fixture? It sounds simple, but it’s an easy fix.
- Fixture Seating: Make sure the fixture itself is properly seated against the ceiling or wall. Sometimes if it’s not quite flush, it can interfere with the connection.
If you’ve gone through these steps and it’s still not working, or if you’re feeling unsure about any of the wiring, it’s always best to turn the power back off at the breaker and consult the fixture’s manual or call a qualified electrician. It’s better to be safe than sorry when dealing with electricity.
Once you’ve confirmed everything is working and secure, you can do any final touch-ups around the fixture, like cleaning off any smudges you might have left on the ceiling or wall during installation. Then, step back and admire your handiwork!
Conclusion
So, you’ve successfully installed your new bathroom light fixture! Give yourself a pat on the back. It might have seemed a bit daunting at first, especially when dealing with electrical wires, but you powered through. Remember to always prioritize safety, double-check your connections, and don’t hesitate to consult an electrician if you’re ever unsure about a step.
Here’s a quick recap of what we covered:
- Safety First: Always turn off the power at the breaker box before starting.
- Wiring: Connect wires securely using wire nuts and electrical tape, matching colors (ground to ground, neutral to neutral, hot to hot).
- Testing: After installation, turn the power back on and test the fixture.
- Touch-ups: Don’t forget to touch up any marks on the ceiling from your work.
It’s amazing what a new light fixture can do for a bathroom’s overall look and feel. It can brighten the space, add a touch of style, and make the room feel more inviting. If you’re still pondering fixture options, this guide on choosing bathroom lighting can help.
While DIY projects can be satisfying, a reliable home renovation service can make the process smoother. You save money, build new skills, and enjoy the satisfaction of a job well done.
Hopefully, this guide has given you the confidence to tackle this project yourself. Enjoy your newly illuminated bathroom!
We’ve covered a lot of ground, from initial planning to the final touches. Remember, building or renovating your dream space is a big step, but it doesn’t have to be overwhelming. We’re here to help make the process smooth and successful. Ready to start your project? Visit our website today to learn more and get a free quote!
Frequently Asked Questions
What’s the most important first step before I start changing my bathroom light?
Safety first! Always turn off the power to your bathroom at the breaker box before you do anything else. It’s a good idea to double-check with a voltage tester to make sure the power is truly off.
How do I know which wires to connect to each other?
Typically, you’ll connect the ground wire (usually green) to the grounding screw. Then, connect the black wire (hot) to the brass screw and the white wire (neutral) to the silver screw on the new fixture. It’s super helpful to take a picture of the old wiring before you disconnect anything!
What tools do I absolutely need for this job?
You’ll need basic tools like a screwdriver, wire cutters or strippers, wire nuts, and a ladder. A voltage tester is also a must-have for safety. Your new fixture will likely come with some of the hardware you need.
How high should I hang my new bathroom light fixture?
For vanity lights above a mirror, aim for about 36 to 48 inches above the countertop. Wall sconces usually go about 60 to 72 inches from the floor. Always check the specific recommendations for your fixture, though!
Can I do this myself, or should I call an electrician?
If you’re just swapping out an old fixture for a new one and feel comfortable with basic wiring, it’s often a doable DIY project. But if you’re unsure about any part of the process, or if you’re doing more complex electrical work, it’s always best to call a licensed electrician to be safe.
What kind of light bulbs should I use?
LED bulbs are a great choice because they save energy and last a long time. Think about the color temperature you want – warmer light is more relaxing, while cooler light can be brighter for tasks. Make sure the bulb’s wattage isn’t higher than what your fixture can handle.